Step by Step
Brew Day Walkthrough
Everything you need to know, in order, with no steps skipped. Let's make some beer.
Everything you need to know, in order, with no steps skipped. Let's make some beer.
Make sure you've read the full recipe and have all your equipment ready. Your spice tincture should have been steeping for at least 3 days. Got everything? Let's go.
Get organized before you start heating anything. A little prep goes a long way.
Pull out everything you'll need and set it on the counter. There's nothing worse than realizing you can't find your thermometer while your water is heating.
If you didn't buy pre-measured ingredients, weigh everything out now:
Put all your grains in a bowl together. Keep the hops separate.
Pour 1.5 gallons of water into your pot and turn the heat to high.
Target temperature: 162°F (72°C)
This is higher than your mash temperature because the cool grains will bring it down. By the time you add the grains and stir, you should land around 152-156°F.
This is where enzymes in the grain convert starches to sugars. Sounds complicated, but you're basically just making hot grain tea.
Once your water hits 162°F:
Target mash temperature: 152-156°F (67-69°C)
This range gives you a nice balance of fermentable sugars (alcohol) and unfermentable sugars (body and sweetness).
Now you need to keep the mash in that 152-156°F range for 60 minutes. Here's how:
Mash temperature is forgiving. Anywhere from 148-160°F will make beer. Lower = drier beer, higher = sweeter beer. Your target of 152-156°F is right in the sweet spot.
After 60 minutes, you can do a "mash out" by raising the temperature to 168°F (76°C) for 5-10 minutes. This stops enzyme activity and makes the wort flow more easily.
Is it required? No. Plenty of brewers skip it. But it doesn't hurt if you want to be thorough.
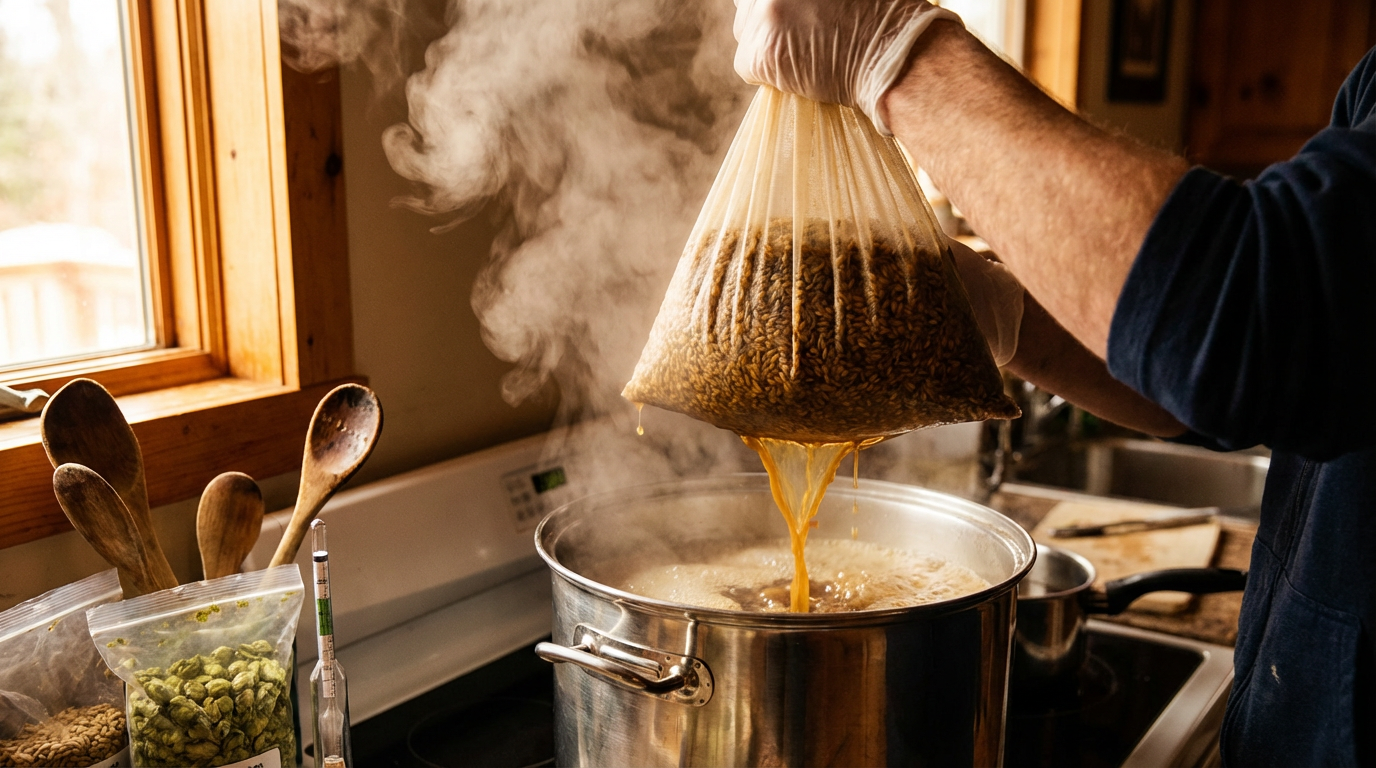
Time to separate the sweet liquid (wort) from the spent grains.
Carefully lift the grain bag out of the pot. It's heavy when full of water. A few options:
Let it drip for 5-10 minutes. You can gently squeeze the bag to get more liquid out—despite what some old-timers say, it won't make your beer taste bad.
Sparging means rinsing the grains with extra water to extract more sugars. For a 1-gallon batch, it's optional but can boost your efficiency.
How to sparge:
If you skip this, your beer will be slightly lower in alcohol. Not a big deal for a small batch.
Look at how much liquid you have in the pot. You want about 1.25-1.5 gallons going into the boil (it will reduce during the hour boil).
Now ditch the spent grains. They make great compost or dog treats (seriously, dogs love them).
An hour of bubbling. This sterilizes the wort, extracts hop bitterness, and concentrates flavors.
Crank up the heat and get that liquid rolling. You want a good, active boil—not a simmer, but not volcanic either.
When the wort first starts boiling, it can foam up violently. Stay close, reduce heat if needed, and stir. Once it calms down (5-10 minutes), you're safe to walk away briefly.
Once you have a rolling boil, start your 60-minute timer and add:
0.5 oz East Kent Goldings hops
Just dump them in. Stir briefly. These "bittering hops" will balance the malt sweetness.
Maintain that rolling boil for the full hour. Things to do while waiting:
When your timer goes off, turn off the heat. This is called "flame out" even if you're using an electric stove.
Check your volume. You should have roughly 1 gallon of wort. A little more or less is fine.
Get that wort cold as quickly as possible. Fast cooling = better beer.
Target: Below 70°F (21°C)
You've got a few options:
If you have a copper or stainless coil chiller, drop it in during the last 15 minutes of the boil to sanitize it. Then run cold water through it after flame out. Chills in 10-15 minutes.
Put the lid on, leave it overnight, and pitch yeast the next day. Some brewers swear by this, though it can slightly affect hop character. Works fine for this recipe.
While the wort is cooling, sanitize anything that will touch it from now on:
Use Star San or your sanitizer of choice. Let it foam up, drain excess, no need to rinse.
Almost done with the active work. Time to let yeast take over.
Once your wort is below 70°F (21°C):
Yeast needs oxygen to start strong. Options:
If you want to know your final ABV, now's the time to take your Original Gravity (OG) reading.
You'll take another reading before bottling and use the two numbers to calculate ABV.
The big moment. "Pitching" just means adding yeast.
Seal up the fermenter and add the airlock (filled with sanitizer or plain water).
Put your fermenter somewhere with:
A closet, basement corner, or even inside a kitchen cabinet works great.
Within a day or two, you should see activity:
This means fermentation is happening. The yeast is eating sugars and making alcohol and CO2.
Don't panic yet. Check the seal on your lid. Try gently swirling the fermenter. If still nothing after 72 hours, you might need to re-pitch fresh yeast. See troubleshooting →
Active bubbling will slow down after a few days. This is normal—most of the fermentation happens in the first 3-4 days.
Resist the urge to open it and peek. Every time you open the fermenter, you risk contamination.
Just wait. Two weeks is the sweet spot for this beer.
This is when you'll:
See the full timeline and spice guide for details on these steps.
You did it. The hardest part is over. Now clean up, pour yourself something to drink, and wait for the magic to happen.